FIVEM VPS SETUP TUTORIAL
Welcome to the 5M Servers guides section, in this guide we will be covering everything you need to know in order to setup a fresh VPS to be used as a server on the FIVEM platform, So lets get started! We have also made a video to make it easier for you, so why not check it out below!
STEP 1: DOWNLOAD THESE FILES ONTO THE VPS
Once these have all be downloaded and installed you can skip to the next step.
STEP 2: PORT FORWARDING TO FIVEM
The machine you are currently using will need some small adjustments in order to be able to work as a server host and be found within the FIVEM platform online. We will have to turn off the standard Windows Firewall on the machine and also port forward to FIVEM. If these steps are not completed your server may not be found and players will likely not be able to join the server.
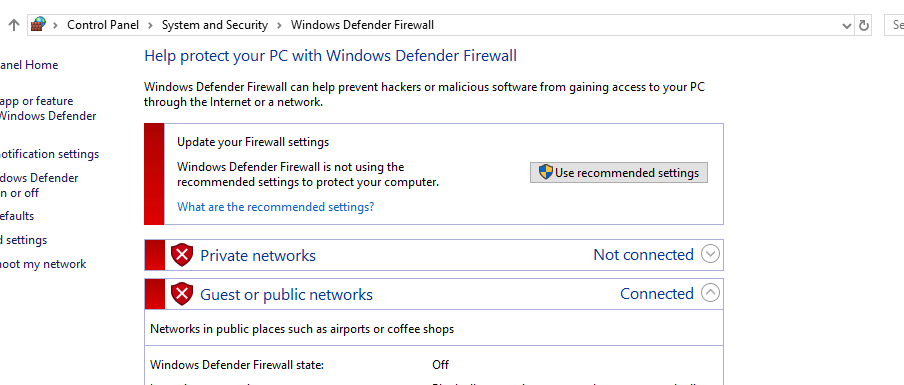
1. Open ‘Windows Defender Firewall’ and turn off all the firewalls, there should be two.
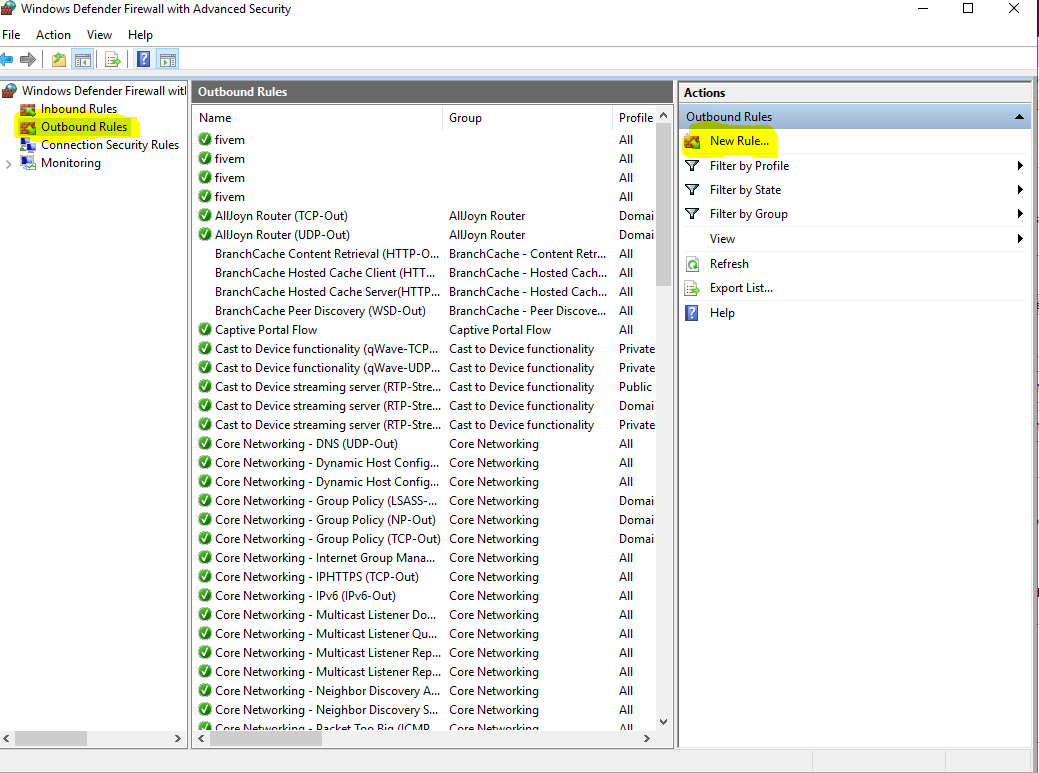
2. Open ‘Windows Defender Firewall With Advanced Security’ As shown below
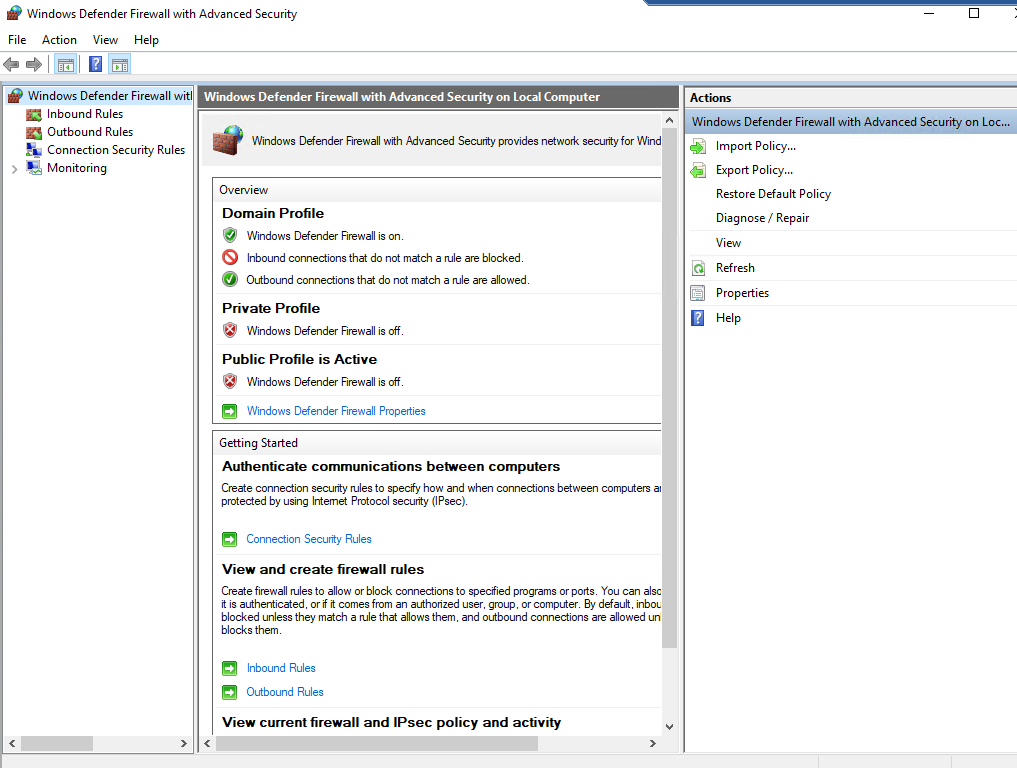
3. At the top left you will see ‘inbound rules’ & ‘outbound rules’ we will basically be creating rules for each one and then we are done
4. Click ‘Inbound Rule’ on the top left, then on the right click ‘New Rule’ you should then see the screen below
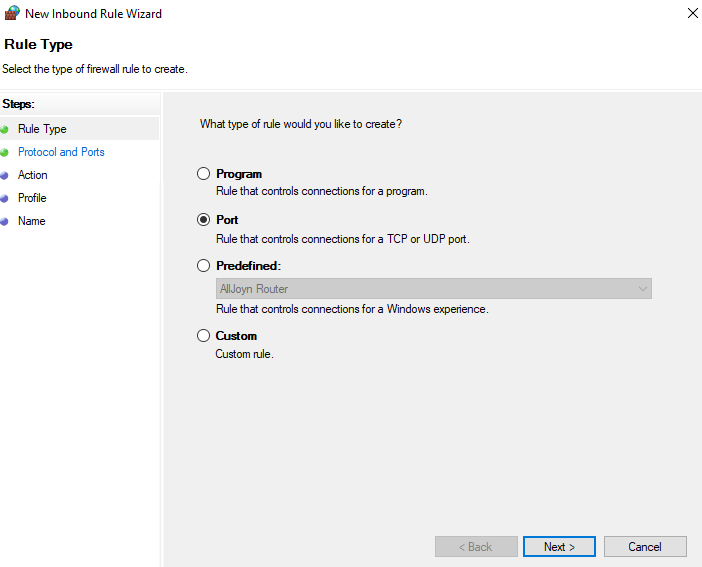
Click on ‘PORT’ and then select ‘next’
5. We need to add the ports ‘30110-30120’ for both the TCP and the UDP. It means we will have to do the same method a few times
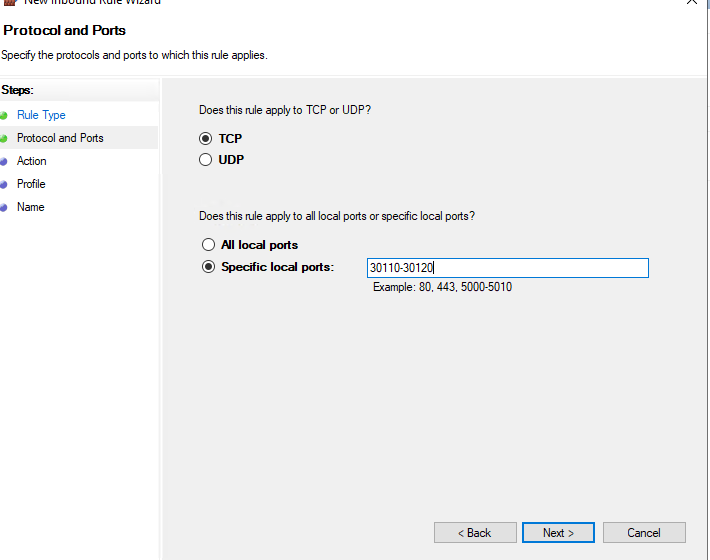
as shown above, then press next…
6. Ensure ‘Allow Connection’ is highlighted and press next..
7. It will show another screen mentioning domain, private, public. They will all be ticked by default. Just click next
8. It will now ask you for a name, just name it ‘Fivem’ dont worry about the description, then press finish.
9. We now need to do the same thing again, but this time we must ensure we select ‘UDP’ and not ‘TCP’ as this was already done
10. Create another new Inbound rule, the same as before.. making sure ‘Port’ is selected and this time ‘UDP’
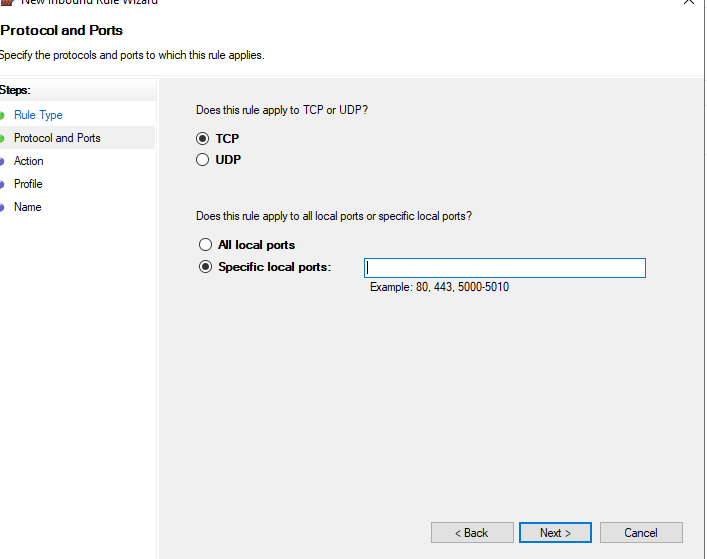
11. The ports will be the same as before ‘30110-30120’ complete the steps the same as before.
12. We now need to create ‘OUTBOUND’ rules as so far we have only create a UDP and TCP for inbound. So we must create OUTBOUND
13. Be careful when creating the outbound rule by default it will make you choose block connection as shown below! make sure you change it to ‘ALLOW CONNECTION’
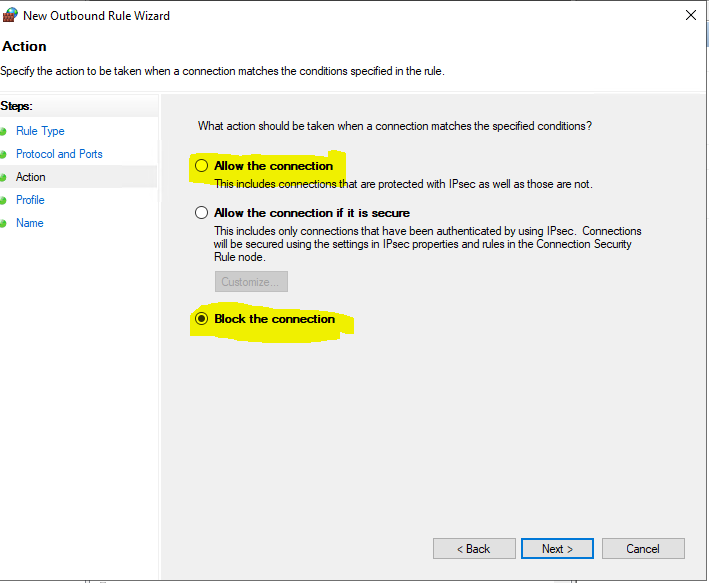
Make sure to change this to ‘Allow Connection’ when creating the outbound rules it always chooses ‘Block the connection’ by default.
STEP 3: THE SERVER FILES
Now your machine is ready to be used as a host, you should be able to turn on your server and join the world. If you have purchased one of our servers you can simply run the ‘STARTER’ file and this will begin to turn on the server. If you are using your own server or files, below you will find the base Artifacts files needed to run the server.